Now that we know how to control GPIOs using code, we can use them to control a circuit like the LED circuit you built in Introduction to Circuits. Before creating a circuit with your microcontroller, make sure it is not connected to the computer.
Reminder: If you need to disconnect the microcontroller from the computer, do not just unplug it! Eject it as you would a flash drive and make sure it is safe to eject.
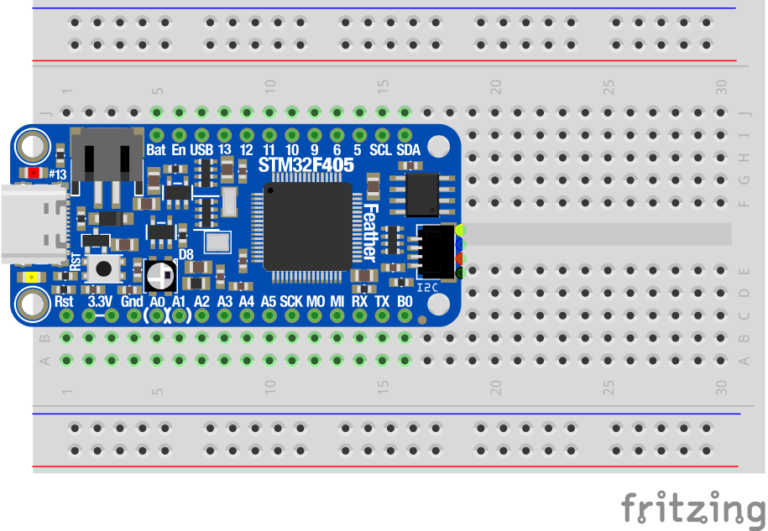
Put your microcontroller on a breadboard. Line up the pins with the breadboard holes as shown below. Sometimes the pins may not slide nicely in place and some moderate force may be required.
Figure 1.9
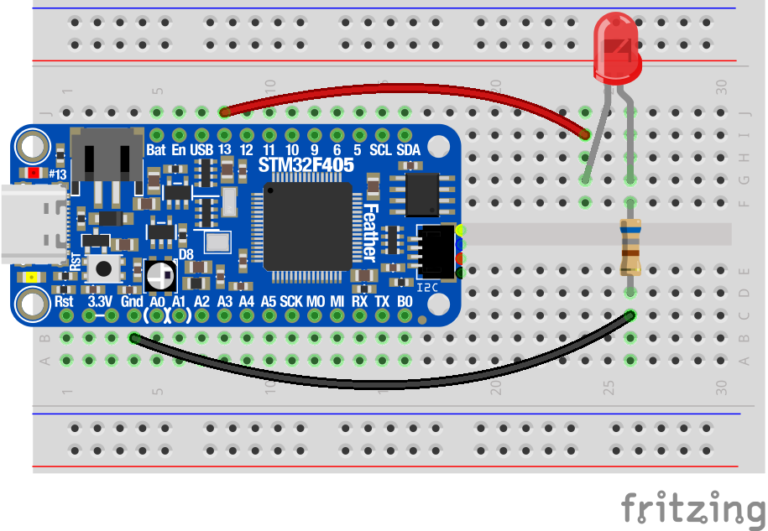
2. Set up the LED circuit using the LED and the 680 ohm resistor. Create the connections using the diagram below. The longer end of the LED is the positive end and needs to be connected to power.
Figure 1.10
3. Now that your circuit construction is complete, connect the microcontroller to the computer using the USB cable.
4. Open Beagle Term. As you did in the last activity you will need to turn on the GPIO which will power your circuit. We will use Pin 13 again.. Type “ from machine import Pin” and press enter. Then initialize pin 13 again by typing “p13 = Pin(‘D13’, Pin.OUT)” and pressing enter. Finally, type “p13.value(1)” and press enter to turn the external LED and the red on-board LED on.
5. Both LEDs should have turned on! Turn your LEDs off by typing “p13.value(0)” and pressing enter. Like in the last exercise with the on-board LED, try blinking your LEDs by going back and forth between the on and off commands.
What if you want to blink your LED many times in a row but don’t want to type out the commands every time? Write a loop! In coding, a loop is a few lines of commands that will repeat many times over until you tell it to stop. Let’s try writing a loop that will blink your LED 10 times.
6. In the same Beagle Term session type “import time” and press enter to load the library called time. Then use the following code to write the loop. First type “for i in range(10):” and press enter. This command begins a loop which will repeat 10 times. Beagle Term will automatically know you have begun a loop and the next line will be indented to show you are adding instructions to your loop.
7. Type “p13.value(1)”. This instruction will turn on your LED. Press enter. The next line will be indented too so you can continue to add code instructions to your loop.
8. Type “time.sleep(0.5)”. This instructs your microcontroller to rest for 0.5 seconds while the LED remains on.
9. Type “p13.value(0)” and press enter. This instruction turns the LED off.
10. Type “time.sleep(0.5)” and press enter. This instructs your microcontroller to rest for another 0.5 seconds while the LED remains off.
11. Press enter to start running the loop. You may have to press enter a few times until the LED starts blinking.
Note: Let’s say you set the LED to blink 100 times but you don’t want that loop to finish, you can interrupt it by pressing CTRL+C
12. What happened when you typed that code? How can you make the LED blink 20 times? 5 times? How can you increase the time between blinks?
Reminder: To disconnect the microcontroller from the computer, do not just unplug it! Eject it as you would a flash drive and make sure it is safe to eject.
Now that you have created one external LED circuit, let’s try adding to it!
Try creating a second LED circuit that is similar to the first using a different GPIO. Use a different numbered pin like ‘D11’ or ‘D12’. See the circuit diagram above for help.
Create another loop that will blink one LED and then the other for 10 repetitions. Get creative with your light show!